One of my favorite features in WordPress 3.0 is the ability to add an editor style to themes which is loaded in the visual editor of WordPress.
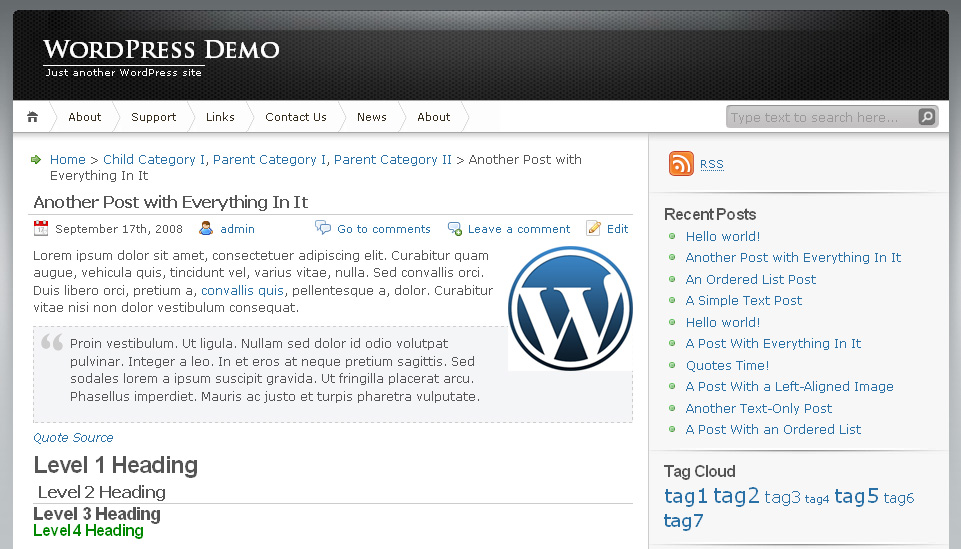
Without an editor style, content in the visual editor has minimal styling and generally does not match how the content looks when it is published on the site. By adding an editor style to a WordPress theme, you can get the content you are managing in the backend to visually match the content on the frontend, creating a more WYSIWYG experience for the end user.
Adding this feature to a new or existing WordPress theme is very simple. For this tutorial, I’ll use iNove, a popular theme from the theme directory that I’m using for a current project and need to update.
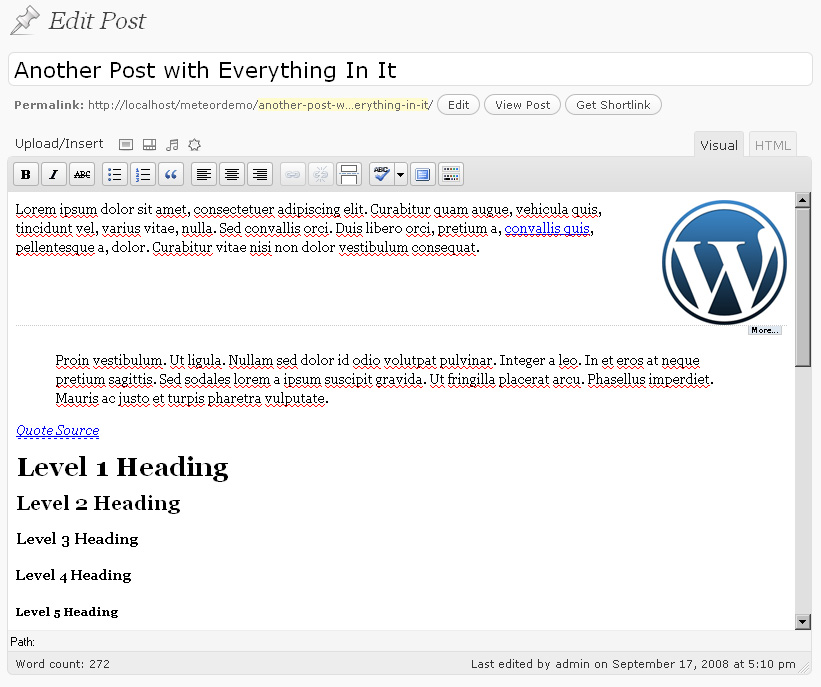
As you can see, version 1.4.6 of iNove doesn’t have support for an editor style. To add this feature, open iNove’s functions.php file in your favorite text editor. At the top of that file, on the third line, add this line of code:
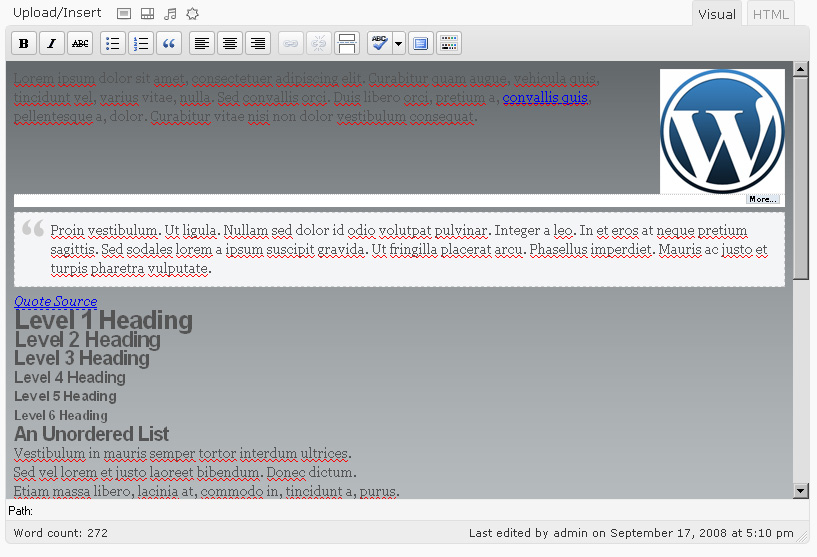
add_editor_style('style.css');Save that file and reload your post in the visual editor, you should see iNove’s stylesheet load in editor, like this:
The stylesheet is now being loaded in the backend, but it looks a bit funky! This is because the content that you are editing is in an iframe, and that iframe is using the theme’s background’s style. We actually want that iframe to use the main column’s background style.
Luckily, the body of this iframe’s content has a handy class on it called mceContentBody, we can use that to add a rule to iNove’s stylesheet which fixes this issue.
Open up iNove’s style.css file and copy this bit of code from it:
body {
	background:#BEC3C6 url(img/bg.jpg) repeat-x;
	color:#555;
	font-family:Verdana,"BitStream vera Sans",Tahoma,Helvetica,Sans-serif;
	font-size:12px;
}
Now paste this at the top of the stylesheet as the first rule, right below the comments and edit it like this to change the background color and set the width, just in the visual editor:
body.mceContentBody  {
	background:#ffffff;
	color:#555;
	font-family:Verdana,"BitStream vera Sans",Tahoma,Helvetica,Sans-serif;
	font-size:12px;
	width: 605px;
}
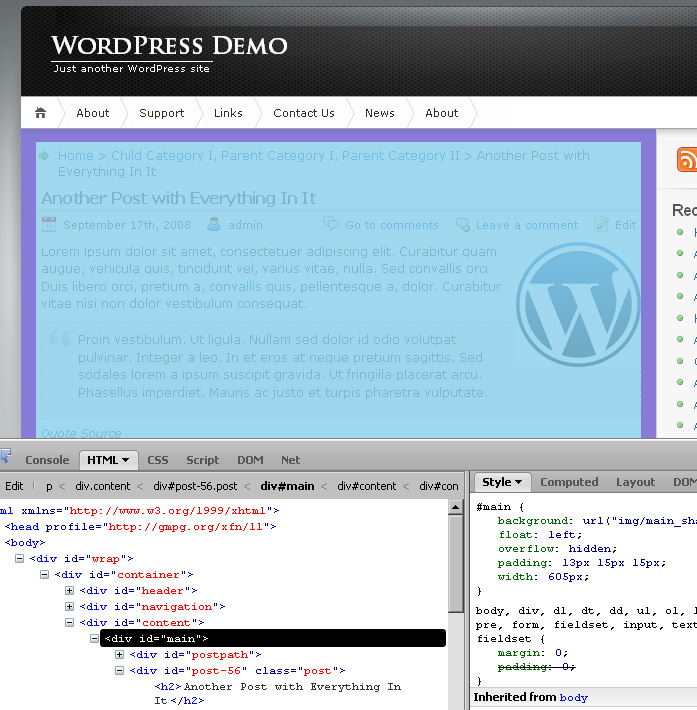
Not sure what the background color and width of your theme’s main column are? Crack open Firebug and take a peek:
Save the edited stylesheet file and refresh the post editor. With any luck, you should see a well styled version of your content that just about matches the published version.
Of course, there are a few issues with this feature, depending on your theme. If your stylesheet styles the headline tags directly like this h1, they will be styled in the visual editor, but if they are styling more specifically like this #content h1, that won’t be styled because the theme has a division with the content ID, but the editor does not. So a few tweaks to the theme may be necessary.
Another issue that I ran into is that link styles are overwritten by the WordPress backend styles in some browsers. This can be a problem if your theme uses any specially styled buttons, but it can be solved by adding !important; to those rules.
This is the easiest way to add an existing theme’s stylesheet to the visual editor, but it does load a lot of extra CSS code that is unneeded in the backend. For new themes you might want to consider splitting your stylesheet into two files, one for the theme’s design, and one for the style of the content so that only those rules that are needed are loaded in the visual editor.


[…] Josh Lueze posted about adding a theme’s CSS style to the visual editor. […]
Did something break with the WP 3.4 update?
My Thematic Child themes are no longer WYSIWYG in the tinymce editor.
No, it should work fine, it’s working for me. But check the codex for the latest info.
Thanks. Weird, because I see it is not working in two themes I did update but is working in one I did not. And searching I found this “Since version 3.4 the TinyMCE body has .rtl CSS class. It is a better option to use that class and add any RTL styles to the main stylesheet.” @ http://queryposts.com/function/add_editor_style/ But I have no idea what I should be doing differently.
This is what I have done:
1) In the child theme functions.php, I added:
// Add styles to the WYSIWYG editor
add_editor_style(‘style.css’);
2) In the style.css file, I added this and more to make styles appear in Visual Editor.
/*—————WP WYSIWYG—————*/
.mceContentBody {
border-top: 2px solid #000000;
width: 575px;
}
.mceContentBody p{
font-size: 160%;
line-height:1.5;
padding: 1em 0 0;
}
But now nothing with the .mceContentBody styles works or appears in FireBug.
That .rtl class would be just for right-to-left languages. The .mceContentBody class is still there and can still be used to style elements just in the editor.
I would try simplifying the problem, deactivate any plugins you have running to rule out any problems there, and try adding a default editor-style.css instead. With a child theme the most likely issue is that the path is wrong, it is trying to load the stylesheet from the parent or the wrong directory.
Add a editor-style.css file to your theme and put just a single rule in there to test it, like:
Then update the add_editor_style function like this to load the default file:
Awesome! This is critical to me and I have tried many different tutorials. I was ….. well, I won’t bother you with that. But I spent much of yesterday dealing with this on a site under development. It was working, then it was not. I am using a Thematic child theme there and I think it broke when I upgraded to WP 3.4. Then I upgraded the Thematic template and it still did not work.
But thanks to you/this, now it does.
Now, what can I do for you?
I did some searching and it says you are from Minnesota. I live in NY, but I am from Minnesota. I am going to send you an email.
No problem Ken, yeah I’m in Minnesota, not too far outside of the Twin Cities.
Josh – do you know how to call the “add_editor_style” function but ONLY for the default style selections (i.e. paragraph, h1, h2, ul / ol, li) ???
That way the WP content editor would at least reflect a (more) WYSIWYG version of the primary CSS font definitions in the theme.
Thanks again for the info above!
Hi Kevin, the example in this post is the fast and dirty way to add support for visual styles to an existing theme.
But what I like to do when building a theme is use two stylesheets; the regular style.css file that has the layout of the theme and and typography.css file that has just the styles for the content of the site, headlines, lists, etc. Then you can load just the typography stylesheet in the admin, and both in the theme on the frontend. It take a little more work to get setup but it’s a lot cleaner and simpler in the long run.